Mastering Complex Lists with the Android RecyclerView.
The RecyclerView was introduced with Google's material design in Android 5.0 Lollipop.
If you are getting started with Android development or are already an experienced developer the RecyclerView is something worth investigating.
The idea of view recycling has been in Android since version 1 in the form of the ListView. The idea is simple, to present large collection of data using a small collection of views, by recycling and rebinding these views.
The RecyclerView is a more flexible pattern of view recycling than ListViews and GridViews. What differentiates the RecyclerView from its predecessors is that it focuses only on recycling views. All the other actions needed to create a view, like how to present data set or inflate the views are delegated to the pluggable classes and that is what makes it so flexible. The hard part is setting up these classes to make a fully functional RecyclerView and that is what I will cover in this article.
To use the RecyclerView you need to follow the following steps:
- Add the support library
- Add the
RecyclerViewin the layout XML file - Create a custom row Layout
- Create the
RecyclerView.Adapterto populate data into theRecyclerView - Create the
ViewHolderto provide a reference to the views for each data item - Bind the
Adapterto theRecyclerViewin theActivity
Lets get started with RecyclerView, you can find the code for the final project on GitHub.
Add dependencies
Open build.gradle (app) and add the dependencies needed.
dependencies { ... compile 'com.android.support:cardview-v7:23.1.0' compile 'com.android.support:recyclerview-v7:23.1.0' } Sync Gradle and you are all set.
Add the RecyclerView to the layout file
<RelativeLayout ... <android.support.v7.widget.RecyclerView xmlns:android="http://schemas.android.com/apk/res/android" android:id="@+id/recyclerview" android:layout_width="match_parent" android:layout_height="match_parent"/> </RelativeLayout> Create a custom row Layout
The row Layout represents the Layout of each single element displayed in the RecyclerView.
Create a file named row_layout.xml and add the following to it:
<android.support.v7.widget.CardView android:id="@+id/cardView" android:layout_width="match_parent" android:layout_height="wrap_content" android:layout_marginBottom="@dimen/activity_vertical_margin" app:cardCornerRadius="@dimen/activity_vertical_margin" app:cardElevation="@dimen/activity_vertical_margin" xmlns:android="http://schemas.android.com/apk/res/android" xmlns:app="http://schemas.android.com/apk/res-auto"> <RelativeLayout android:layout_width="match_parent" android:layout_height="wrap_content" android:padding="16dp"> <ImageView android:id="@+id/imageView" android:layout_width="wrap_content" android:layout_height="wrap_content" android:layout_alignParentLeft="true" android:layout_alignParentTop="true" android:layout_marginRight="16dp" /> <TextView android:id="@+id/title" android:layout_width="wrap_content" android:layout_height="wrap_content" android:layout_alignParentTop="true" android:layout_toRightOf="@+id/imageView" android:text="Title" android:textSize="30sp" /> <TextView android:id="@+id/description" android:layout_width="wrap_content" android:layout_height="wrap_content" android:layout_below="@+id/title" android:layout_toRightOf="@+id/imageView" android:text="Description" /> </RelativeLayout> </android.support.v7.widget.CardView> The RecyclerView will be a list of randomly chosen movies and a description. We need a class that represents a single RecyclerView item data, create a file named Data.java and add the following:
public class Data { public String title; public String description; public int imageId; Data(String title, String description, int imageId) { this.title = title; this.description = description; this.imageId = imageId; } } The RecyclerView Adapter
The RecyclerView.Adapter is similar to the Adapters used on a ListView but with a ViewHolder required to improve performance. A ListView has adapters for different sources such as the ArrayAdapter for arrays and CursorAdapter for database results. The RecyclerView.Adapter requires a custom implementation to supply data to the adapter.
The adapter has three methods.
onCreateViewHolder()inflates the row layout is and initializes the View Holder. Once the View Holder is initialized it manages thefindViewById()methods, finding the views once and recycling them to avoid repeated calls.onBindViewHolder()uses the View Holder constructed in theonCreateViewHolder()method to populate the current row of theRecyclerViewwith data.
Create a new file named Recycler_View_Adapter.java with the following class:
public class Recycler_View_Adapter extends RecyclerView.Adapter<View_Holder> { List<Data> list = Collections.emptyList(); Context context; public Recycler_View_Adapter(List<Data> list, Context context) { this.list = list; this.context = context; } @Override public View_Holder onCreateViewHolder(ViewGroup parent, int viewType) { //Inflate the layout, initialize the View Holder View v = LayoutInflater.from(parent.getContext()).inflate(R.layout.row_layout, parent, false); View_Holder holder = new View_Holder(v); return holder; } @Override public void onBindViewHolder(View_Holder holder, int position) { //Use the provided View Holder on the onCreateViewHolder method to populate the current row on the RecyclerView holder.title.setText(list.get(position).title); holder.description.setText(list.get(position).description); holder.imageView.setImageResource(list.get(position).imageId); //animate(holder); } @Override public int getItemCount() { //returns the number of elements the RecyclerView will display return list.size(); } @Override public void onAttachedToRecyclerView(RecyclerView recyclerView) { super.onAttachedToRecyclerView(recyclerView); } // Insert a new item to the RecyclerView on a predefined position public void insert(int position, Data data) { list.add(position, data); notifyItemInserted(position); } // Remove a RecyclerView item containing a specified Data object public void remove(Data data) { int position = list.indexOf(data); list.remove(position); notifyItemRemoved(position); } } Creating the ViewHolder
The RecyclerView uses a ViewHolder to store the references to the relevant views for one entry in the RecyclerView. This solution avoids all the findViewById() method calls in the adapter to find the views to be filled with data.
Create a file named View_Holder.java with the following class:
public class View_Holder extends RecyclerView.ViewHolder { CardView cv; TextView title; TextView description; ImageView imageView; View_Holder(View itemView) { super(itemView); cv = (CardView) itemView.findViewById(R.id.cardView); title = (TextView) itemView.findViewById(R.id.title); description = (TextView) itemView.findViewById(R.id.description); imageView = (ImageView) itemView.findViewById(R.id.imageView); } } The LayoutManager
The Layout Manager attaches, measures, and lays out all the child views of the RecyclerView in real-time. As the user scrolls the view, the Layout Manager determines when new child views will be added and when the old child views will be detached and deleted.
These default implementations are available:
LinearLayoutManager– Displays items in a vertical or horizontal scrolling list.GridLayoutManager– Displays items in a grid.StaggeredGridLayoutManager– Displays items in a staggered grid.
You can create a custom LayoutManager by extending RecyclerView.LayoutManager or one of the implementations above and overriding the methods required.
Now that the RecyclerView is finished the next step is to fill it with some data. In the onCreate() method of the MainActivity class create an instance of the Recycler_View_Adapter and give this adapter the list of data and the context. The getApplication() method will provide the application context.
List<Data> data = fill_with_data(); RecyclerView recyclerView = (RecyclerView) findViewById(R.id.recyclerview); Recycler_View_Adapter adapter = new Recycler_View_Adapter(data, getApplication()); recyclerView.setAdapter(adapter); recyclerView.setLayoutManager(new LinearLayoutManager(this)); We will also need sample data, for this example I have created a default function, in a real app, this may come from a data source.
public List<Data> fill_with_data() { List<Data> data = new ArrayList<>(); data.add(new Data("Batman vs Superman", "Following the destruction of Metropolis, Batman embarks on a personal vendetta against Superman ", R.drawable.ic_action_movie)); data.add(new Data("X-Men: Apocalypse", "X-Men: Apocalypse is an upcoming American superhero film based on the X-Men characters that appear in Marvel Comics ", R.drawable.ic_action_movie)); data.add(new Data("Captain America: Civil War", "A feud between Captain America and Iron Man leaves the Avengers in turmoil. ", R.drawable.ic_action_movie)); data.add(new Data("Kung Fu Panda 3", "After reuniting with his long-lost father, Po must train a village of pandas", R.drawable.ic_action_movie)); data.add(new Data("Warcraft", "Fleeing their dying home to colonize another, fearsome orc warriors invade the peaceful realm of Azeroth. ", R.drawable.ic_action_movie)); data.add(new Data("Alice in Wonderland", "Alice in Wonderland: Through the Looking Glass ", R.drawable.ic_action_movie)); return data; } You can find the icon files for the ic_action_movie button referenced above here.
This completes all the steps to set up a RecyclerView.
Animating recycles with ItemAnimator
So far I've explained all that's needed to create your own RecyclerView and explained what each part of the RecyclerView structure does. Now lets make things more interesting with item animation.
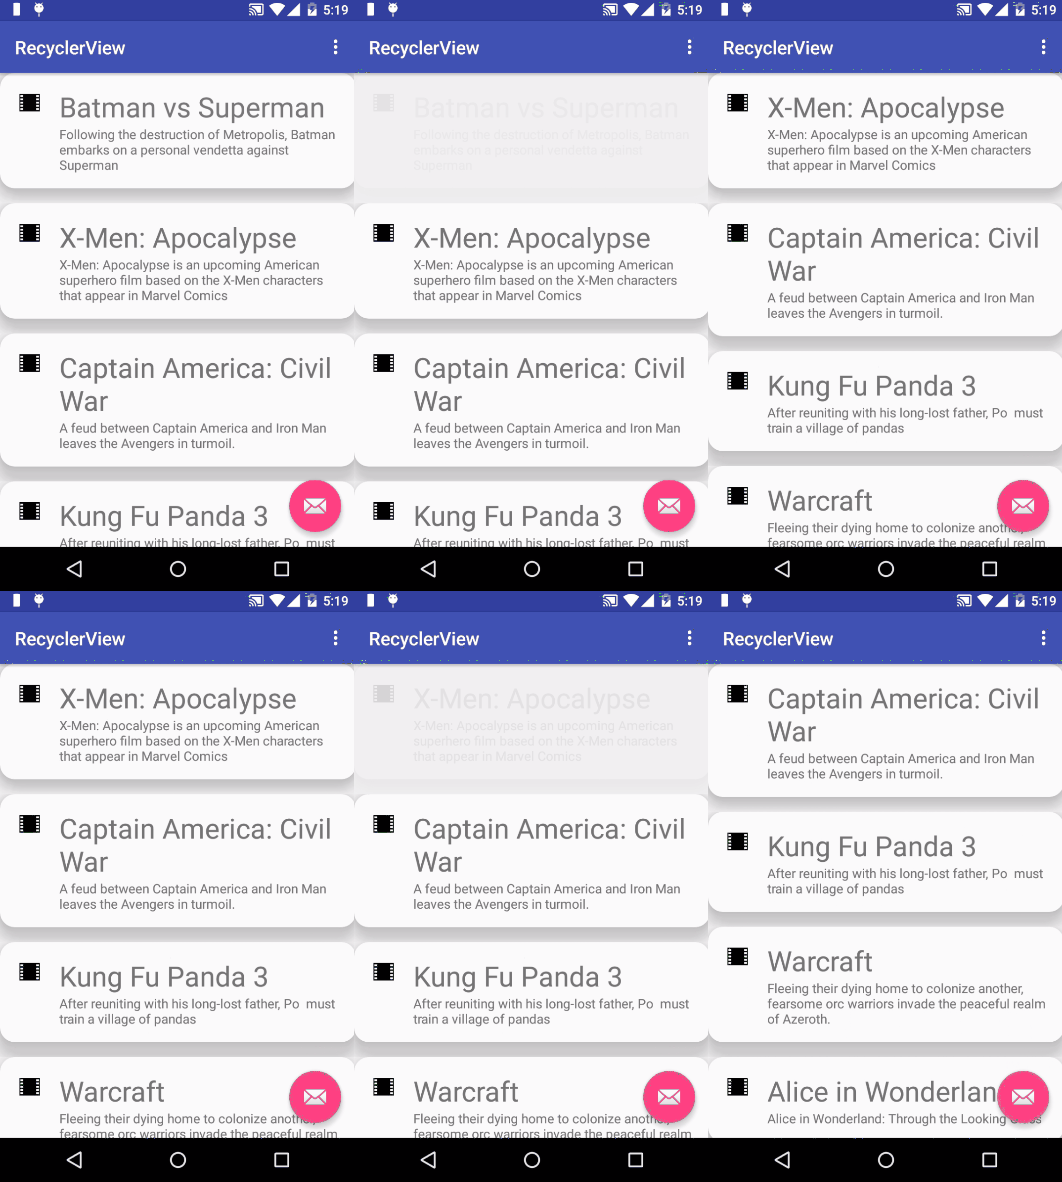
RecyclerView.ItemAnimator is a class that defines the animations performed on items and will animate ViewGroup changes such as add/delete/select notified to the adapter. DefaultItemAnimator is a basic animation available by default with the RecyclerView.
To customize the DefaultItemAnimator add an item animator to the RecyclerView. This code does simply slows down the process of adding and removing items from the RecyclerView.
Add this after our last code in the onCreate method:
RecyclerView.ItemAnimator itemAnimator = new DefaultItemAnimator(); itemAnimator.setAddDuration(1000); itemAnimator.setRemoveDuration(1000); recyclerView.setItemAnimator(itemAnimator); 

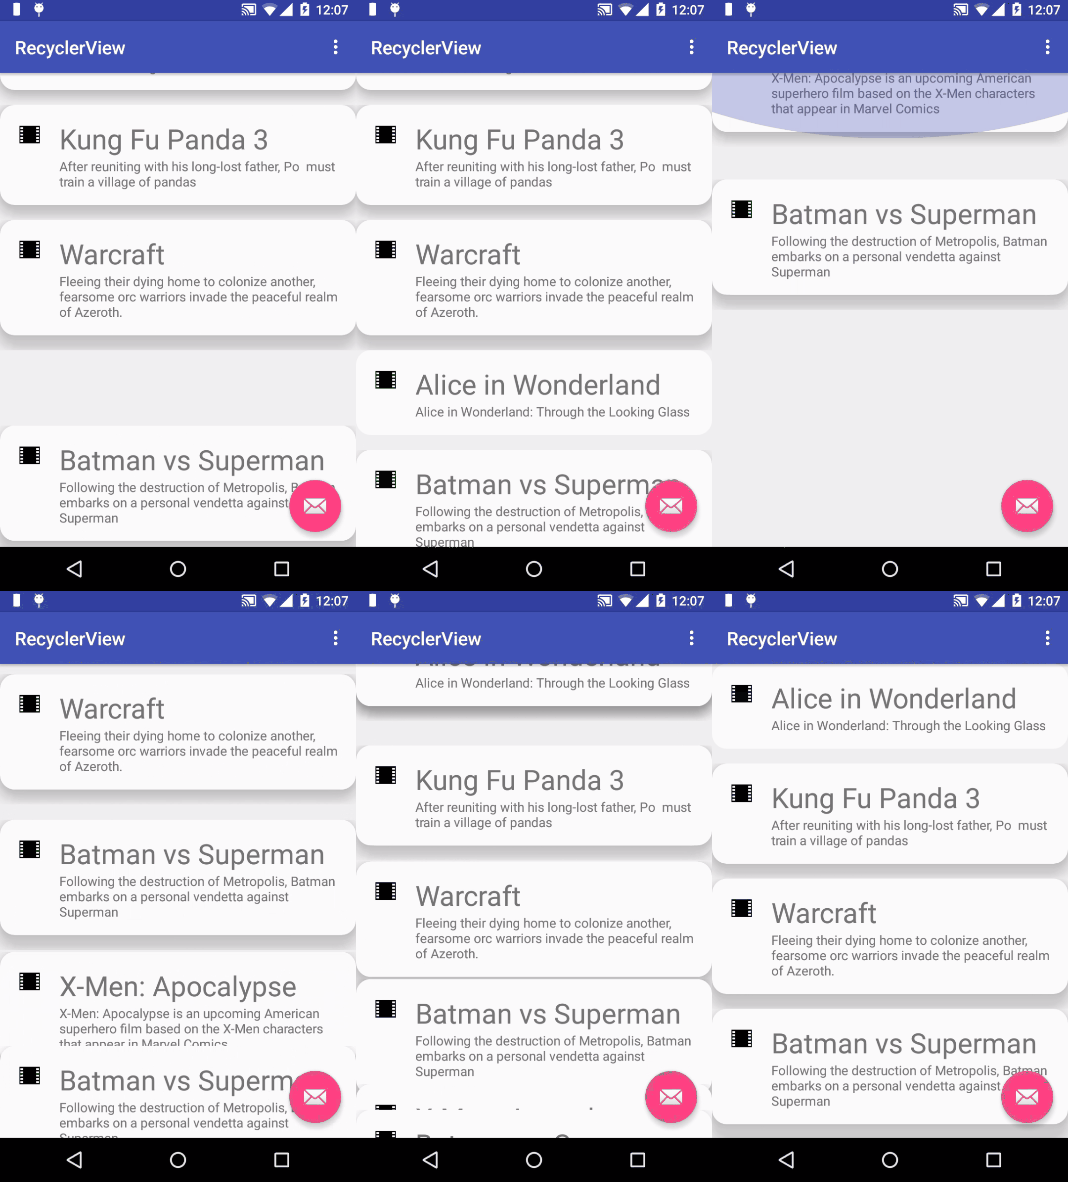
Another approach to animating RecyclerView items is to use Android Interpolators. According to developer.android.com, an interpolator defines the rate of change of an animation.
The following examples represent two animations I implemented using these interpolators. Save the files in /anim/ in the project resources folder.
anticipateovershoot_interpolator.xml
<?xml version="1.0" encoding="utf-8"?> <set xmlns:android="http://schemas.android.com/apk/res/android" android:interpolator="@android:anim/anticipate_overshoot_interpolator"> <translate android:fromYDelta="-50%p" android:toYDelta="0" android:duration="2000" /> </set> bounce_interpolator.xml
<?xml version="1.0" encoding="utf-8"?> <set xmlns:android="http://schemas.android.com/apk/res/android" android:interpolator="@android:anim/bounce_interpolator"> <translate android:duration="1500" android:fromYDelta="-150%p" android:toYDelta="0" /> </set> Now let's return to the RecyclerView. Inside the RecyclerView Adapter class add the following function.
public void animate(RecyclerView.ViewHolder viewHolder) { final Animation animAnticipateOvershoot = AnimationUtils.loadAnimation(context, R.anim.bounce_interpolator); viewHolder.itemView.setAnimation(animAnticipateOvershoot); } If you take a closer look at the loadAnimation() method, it requires a context parameter and that's why the Adapter's constructor was modified in the first place. Now we can animate the RecyclerView. Inside the onBindViewHolder() method, call the animate() function and pass the holder parameter of the View_Holder class.
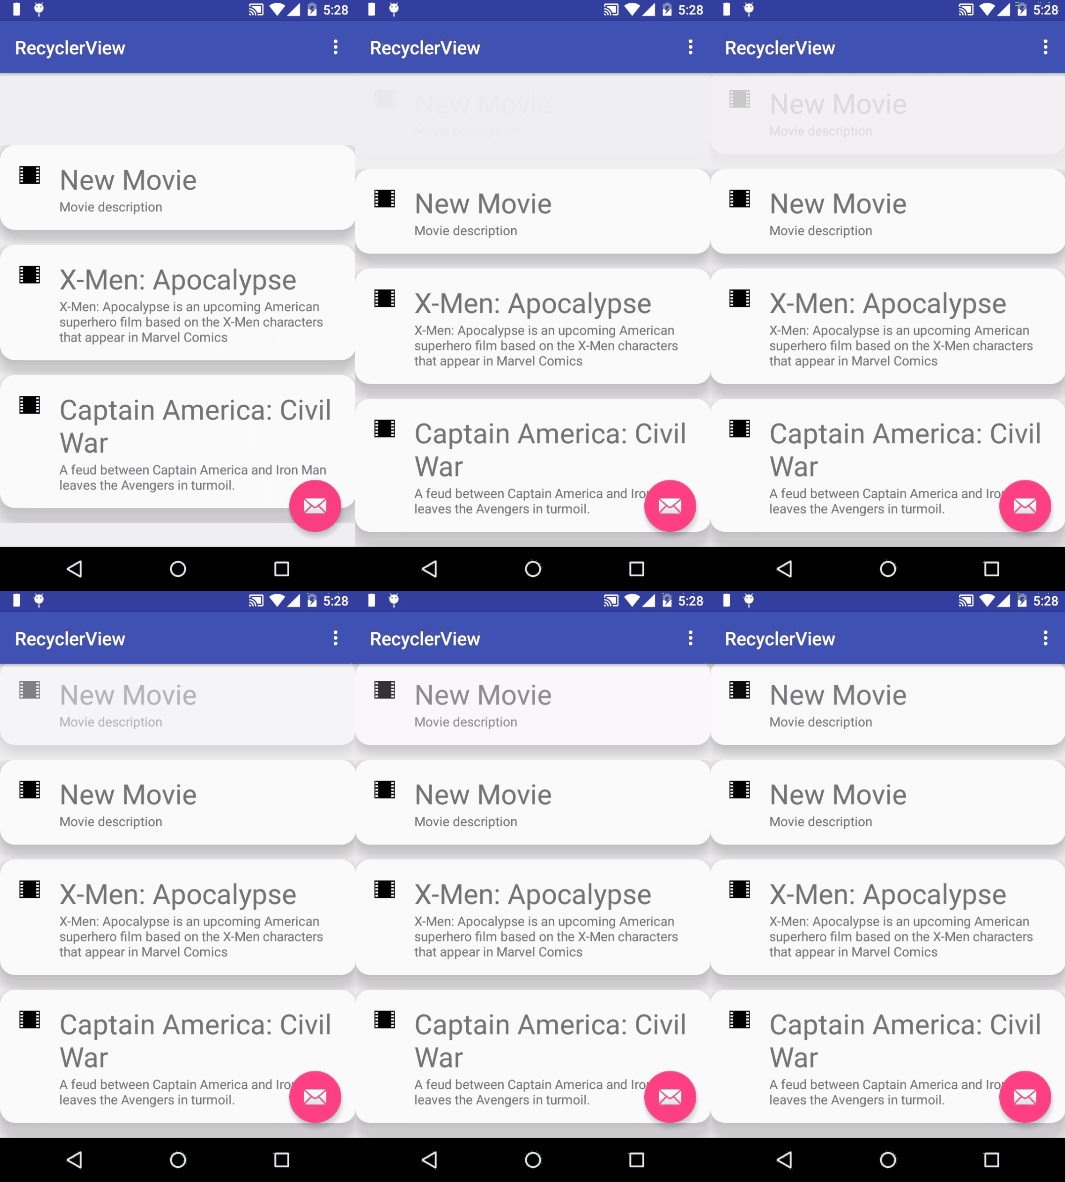
Run the app and test the animation. Here is how the bounce_interpolator animation works.

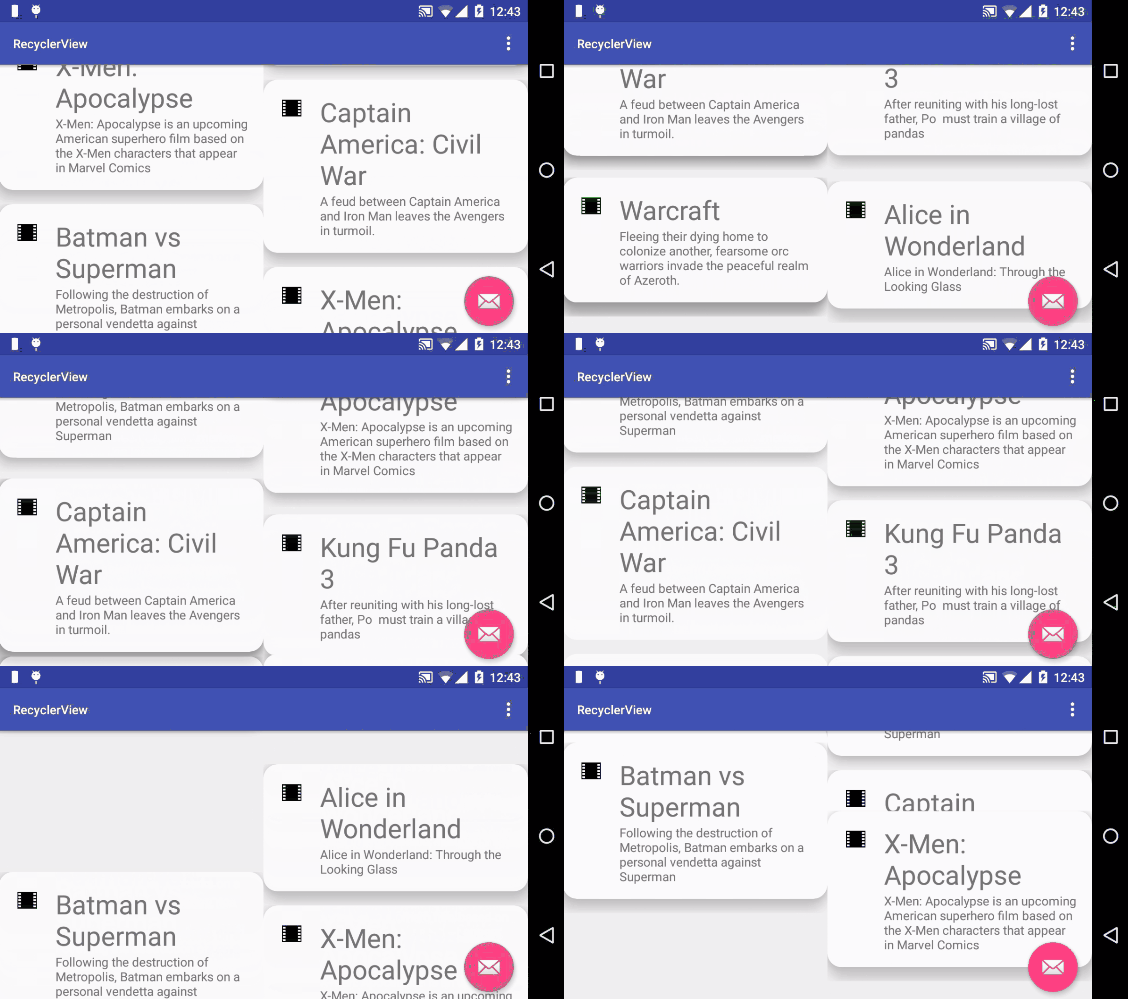
Next let's test the anticipate_overshoot_interpolator animation, but first I'll set the RecyclerView's layout manager to StaggeredGrid in the Main Activity's onCreate() method with a 2 column span and vertical scrolling.
recyclerView.setLayoutManager(new StaggeredGridLayoutManager(2,StaggeredGridLayoutManager.VERTICAL)); 
Using this method of animation in the RecyclerView is easy. If you want new animations, just change the interpolation type in the examples above, set the parameters to your preference and you will have a new animation style.
Conclusion
The RecyclerView is a flexible pattern for view recycling eliminating the imitations of ListView and GridView by making item animations easy to set and reuse. Getting used to development with RecyclerView may need some work at first, but it's worth your time.
If you have any questions or comments please let me know below.
Source: www.bing.com
Images credited to www.bing.com and ak1.ostkcdn.com
